Cut-out figures, shaped/drilled boards, shaped vinyl and cut-out lettering
IMPORTANT: Artwork files must contain only one cut-out shape/design.
Artwork files must be supplied with a layer indicating how and where the item should be shaped and/or drilled following the guidelines below. Artwork supplied incorrectly will be rejected and may delay your order.
This file supply guide applies to the following products.
| Product Codes |
Name |
| IGCOF? |
Cut-out Figures |
| IGFX?S? |
Shaped / Drilled Foamex Boards & Signs |
| IGDB?S? |
Shaped / Drilled Dibond Boards & Signs |
| IGCX?S? |
Shaped / Drilled Correx Boards & Signs
|
| IGWG?S? |
Shaped Window Graphics / Decals |
| IGWVI?S |
Shaped 'Flat Wall' Vinyl Stickers |
| IGBVI?S |
Shaped 'Brick Wall' Vinyl Stickers |
| IGFVI?S |
Shaped Floor Vinyl Stickers |
| IGFX5SF? |
Selfie Frames |
Ask us for a template before starting your design.
Special Requirements
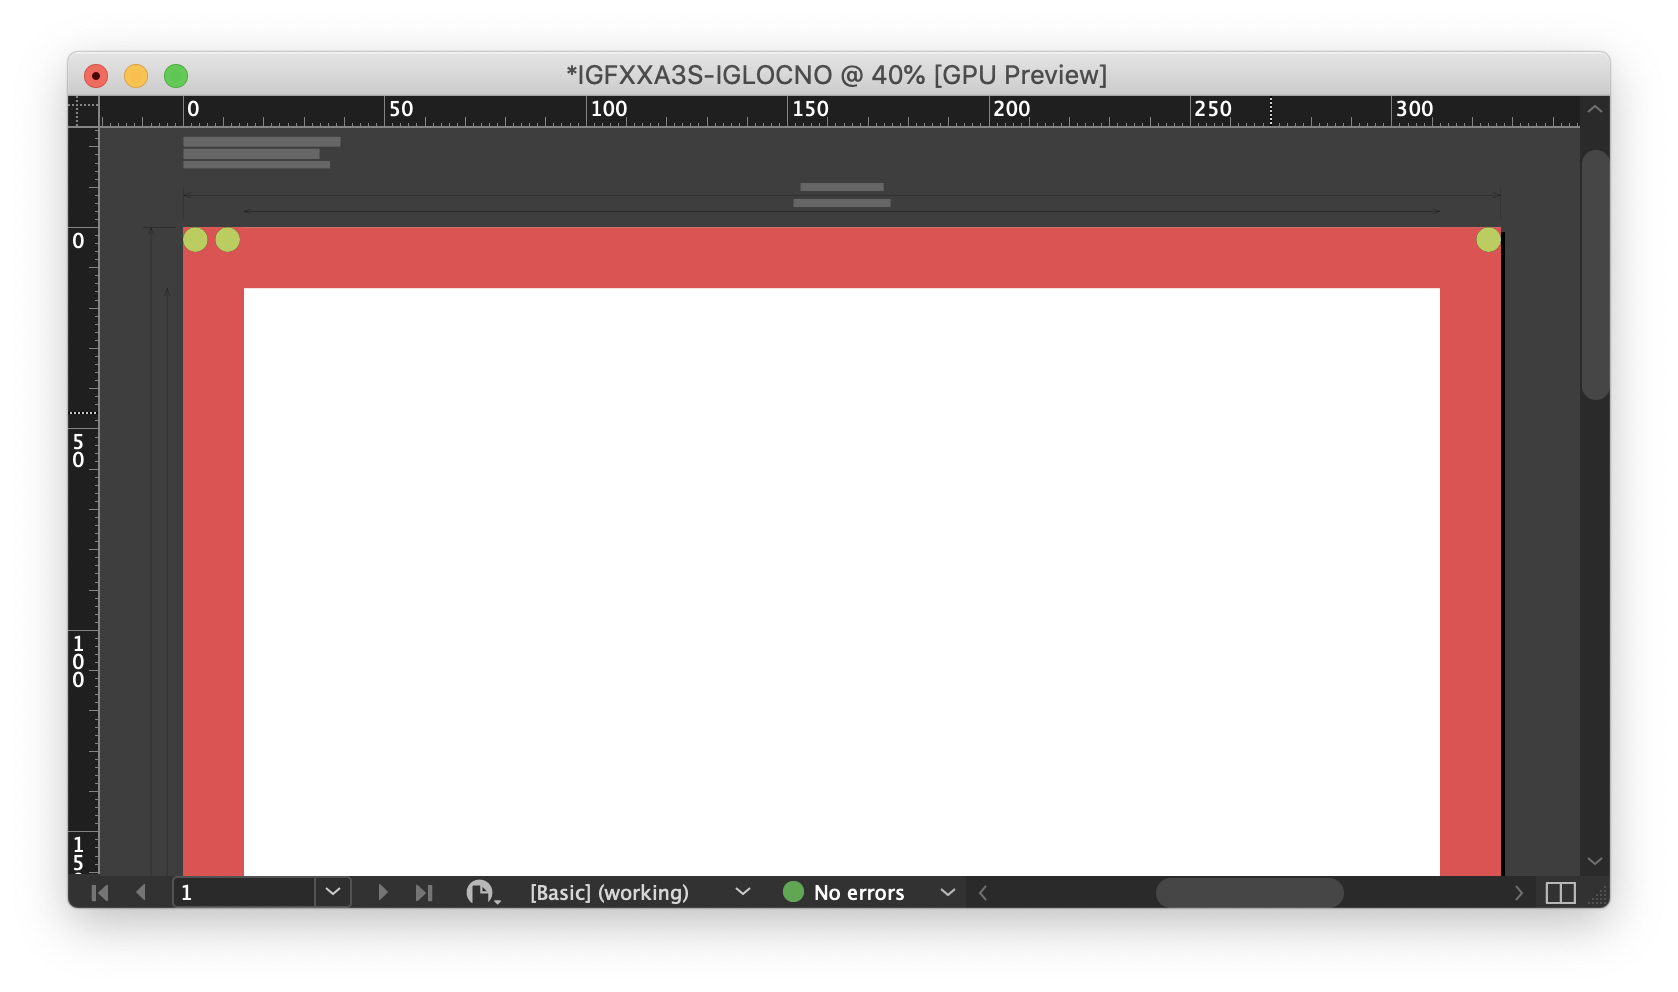
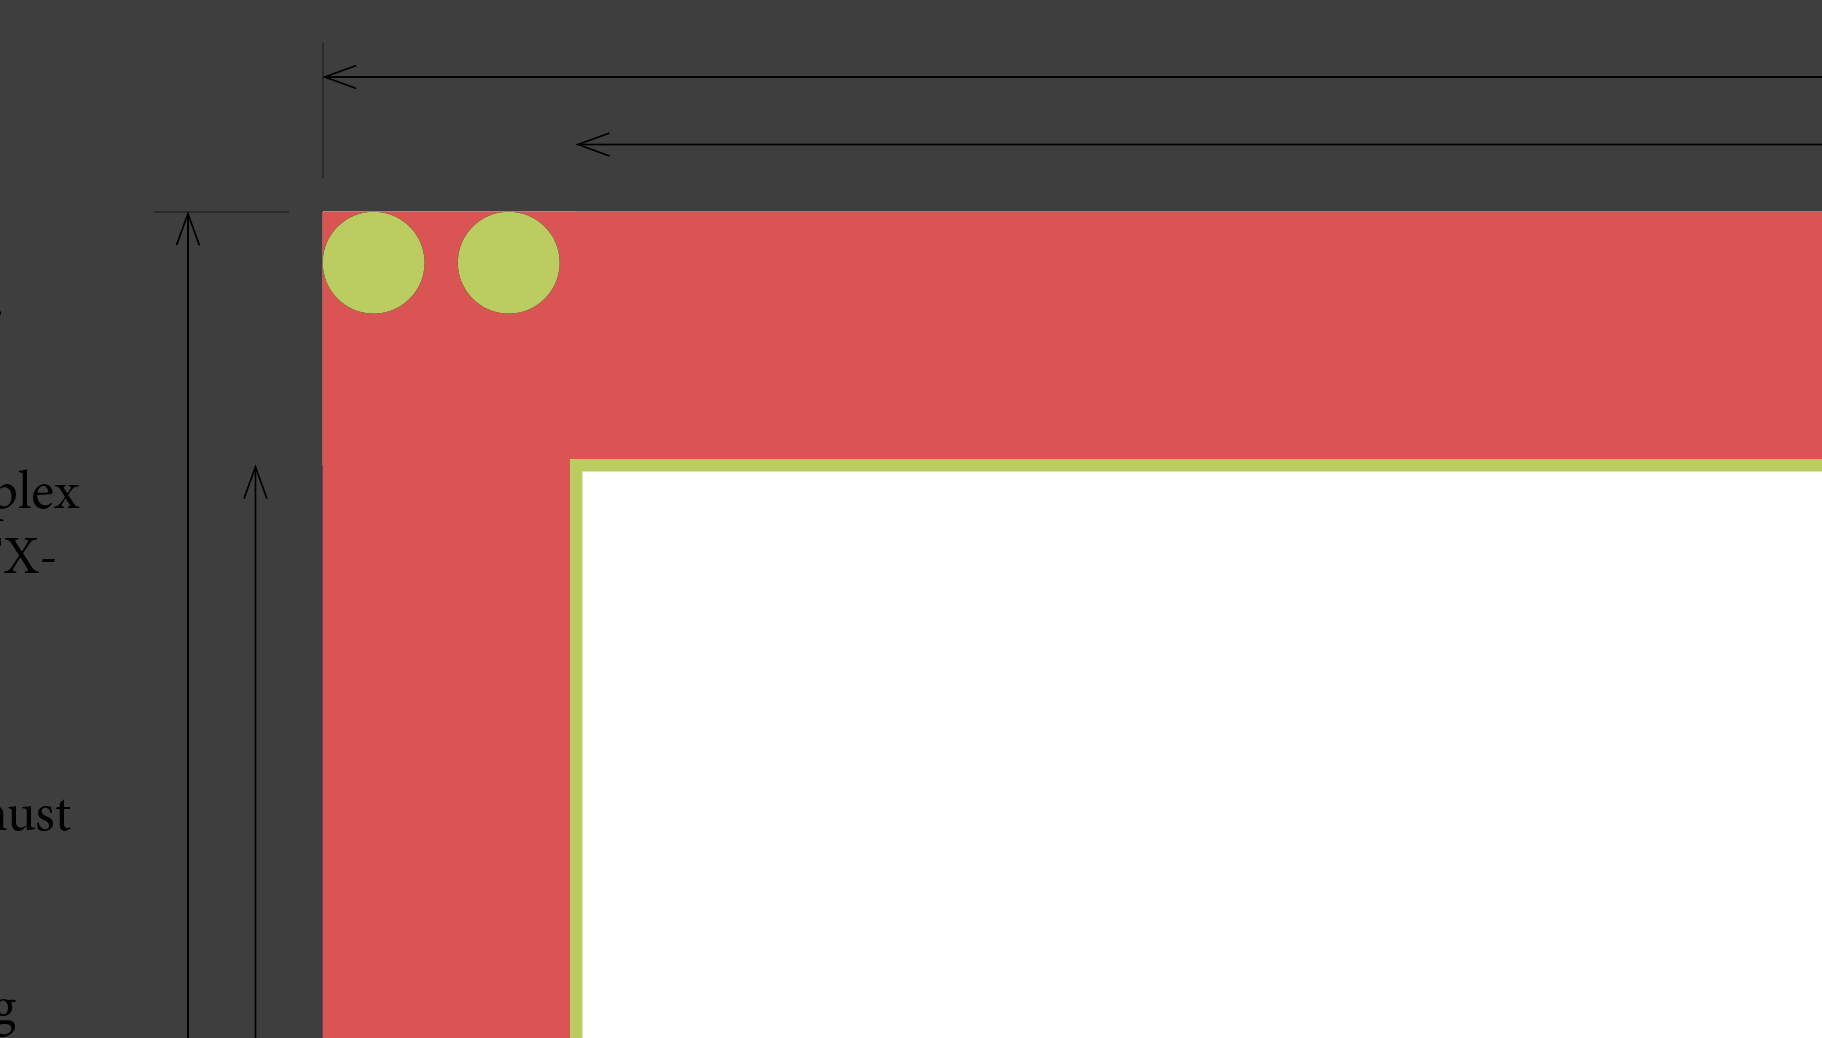
1) 'No Print' Bleed Area
The 15mm bleed on these products is a non-print area for the registration marks used by the machine to align the cut.
This will be displayed by red rectangles within the finishing layer - these are then removed from the file by FileCheck leaving only the registration circles on the print-ready PDF.
2) Node/Anchor Point Limits
| Product |
Max Node Complexity per file |
| Cut-out Figures |
40 |
| Shaped/Drilled Boards |
40 |
| Shaped Vinyls (Decals) |
40 |
| Selfie Frames |
10
|
| Cut-out Lettering |
30 characters |
3) Solid shape cut paths
Ensure any die-cut paths are solid shapes including at the trim edge where there are straight edges. A solid shape is a "compound path", which means that it's a closed shape with no open ends. This includes straight edges as there is no guillotining on these products.
All Drilled Products require a cutting path to be present on your print-ready file. See the next step for guidance on setting up your cutting path.
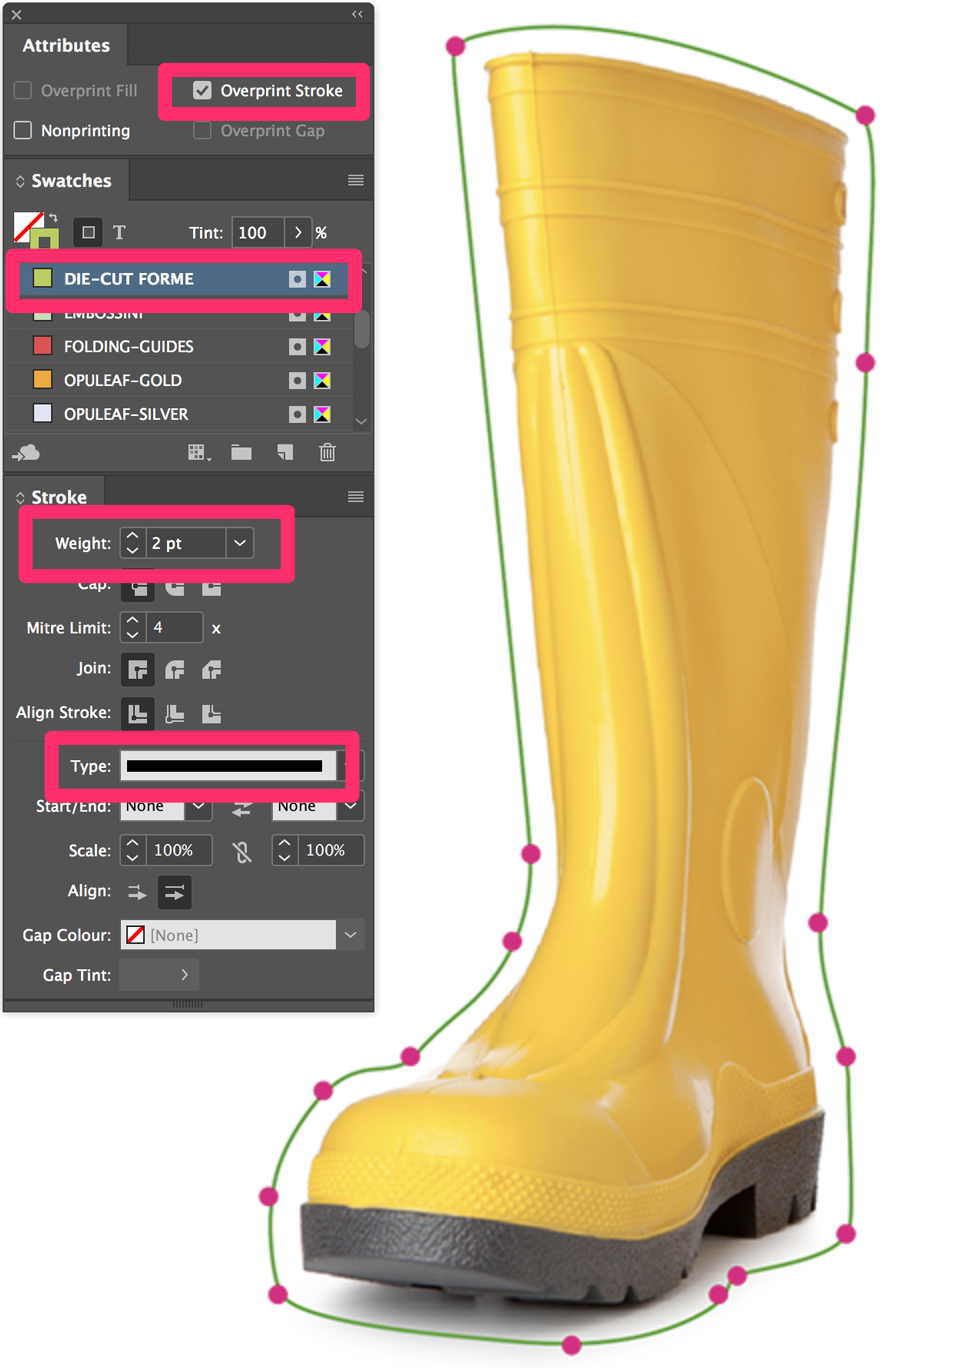
4) Cutter guide set up
Your shape needs to be set in a 2pt stroke line using the DIE-CUT FORME swatch that is available within the template. Your line also needs to be set to overprint. Note point 3 above about the shape having to be a complete shape, including any straight edges.
Cutting tolerances are 1mm therefore we recommend bleeding your artwork 2mm over the cutter guide. For Selfie Frames, this means bleeding any background colours 2mm inside of the window. Do not bleed colours into the non-print areas.
5a) Drill holes
If required, drill holes need to be specified with solid DIE-CUT FORME circles with the fill set to Overprint. A 5mm diameter hole is the minimum. There is no maximum restriction. However, if you are using standard screws to fit the sign, you probably wouldn't want to go bigger than 5mm anyway.
5b) (Stand-off) Locator Drill Holes
Locators are the chrome fixings that go through the panels to stand them away from the wall.
We have two types of locator.
- IGLOC16 use a 12mm diameter holes, 20mm in from edges.
- IGLOC25 also use 12mm diameter holes, 20mm in from edges.
Please make sure to select the appropriate Locator finishing options when prompted during Checkout.
Locator Drill Holes must be present on your artwork if the above finishing options are selected.
The set up for these marks should be done on the finishing layer using a solid DIE-CUT Forme Circle set to Overprint.
Locator Drill Hole Position
You should have the locator circles positioned 25mm from the trim edge. Which is 40mm from the page edge.
16mm Locators - 12mm diameter DIE-CUT-FORME circles
25mm Locators – 12mm diameter DIE-CUT-FORME circle
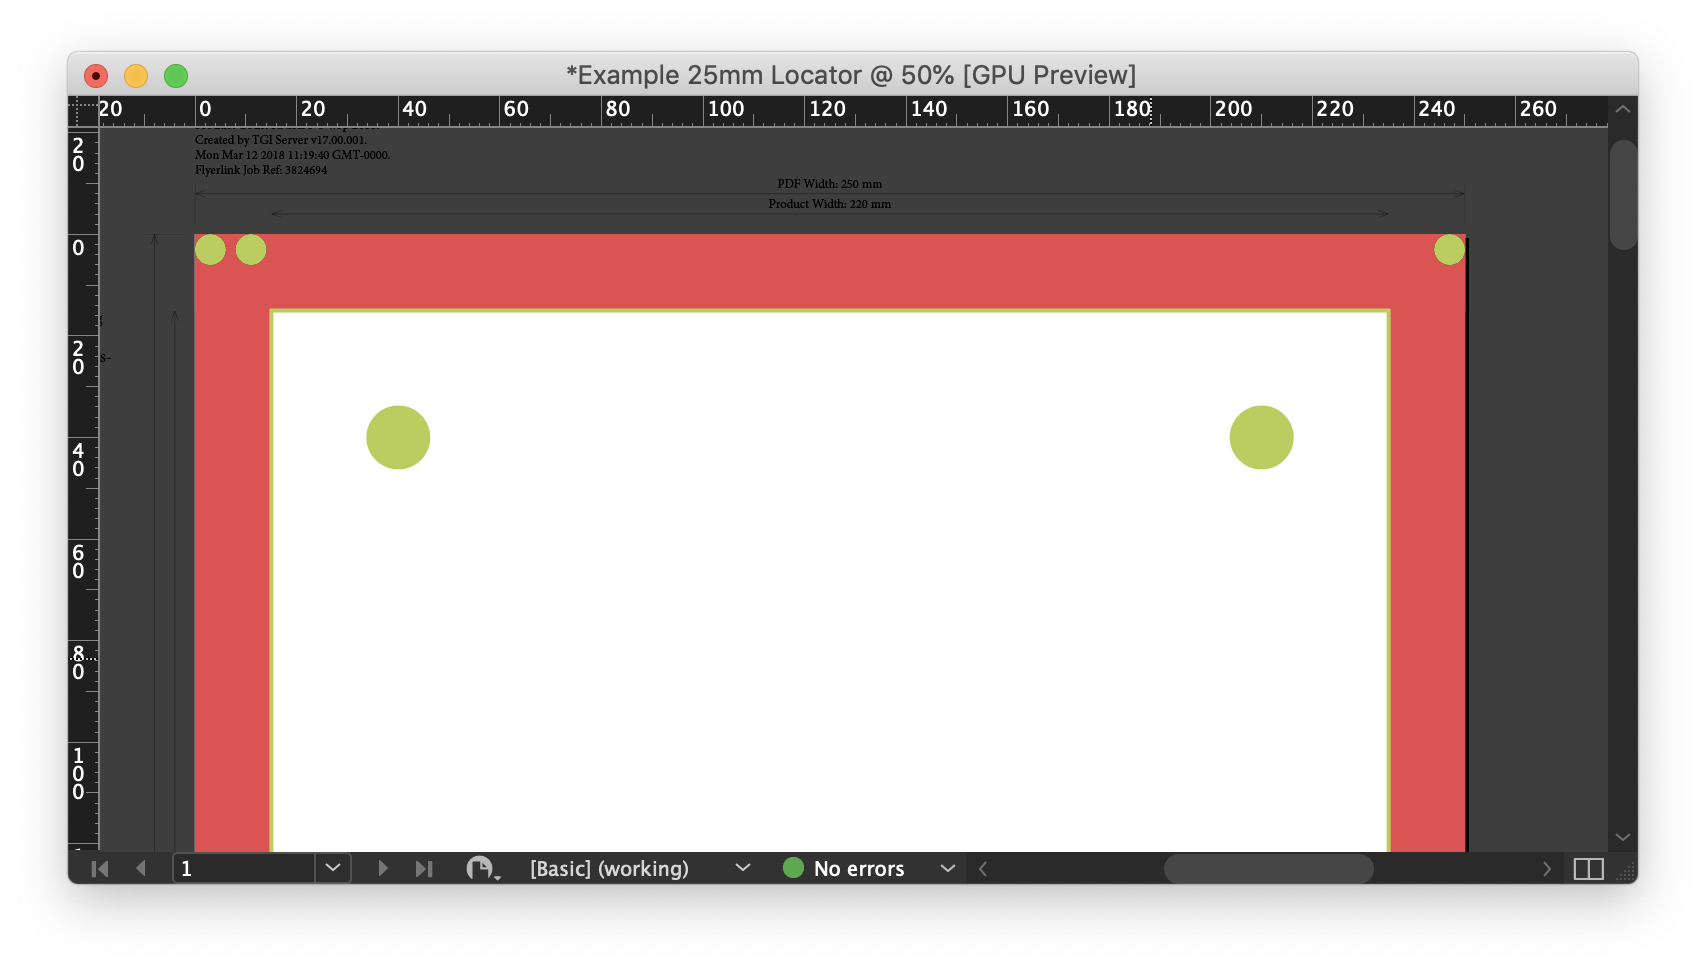
These should be positioned in the 4 corners, then at the mid-points (page size and/or Locator quantity dependant).

 Print this page