Acrylic is often used to create rich photo-realistic images that are both scratch and shatter-resistant. These properties make for stunning durable, high-quality displays that are guaranteed to make a big impression.
Clear Acrylics are sub-surface printed in full colour with UV inks then fully backed in white to produce a photo-realistic quality finish. White Acrylics are printed direct to board using the same UV inks.
Both are suitable for indoor and outdoor use and Acrylic panels can also be backlit for extra visual impact using LED and tube lighting.
An example of Clear Acrylic with full white backing

An example of White Acrylic

Templates
Templates must be used for this Product and can be downloaded from the or the section of the Job Summary.
Files MUST be processed using FileCheck before being progressed to print.
Special Requirements
1) 'No Print' Bleed Area
The 8mm bleed on these products includes a selective non-print area for the registration marks used by the machine to align the cut.
This will be displayed by white rectangles within the finishing layer (see below) which are then removed by FileCheck leaving only the registration circles on the print-ready PDF.
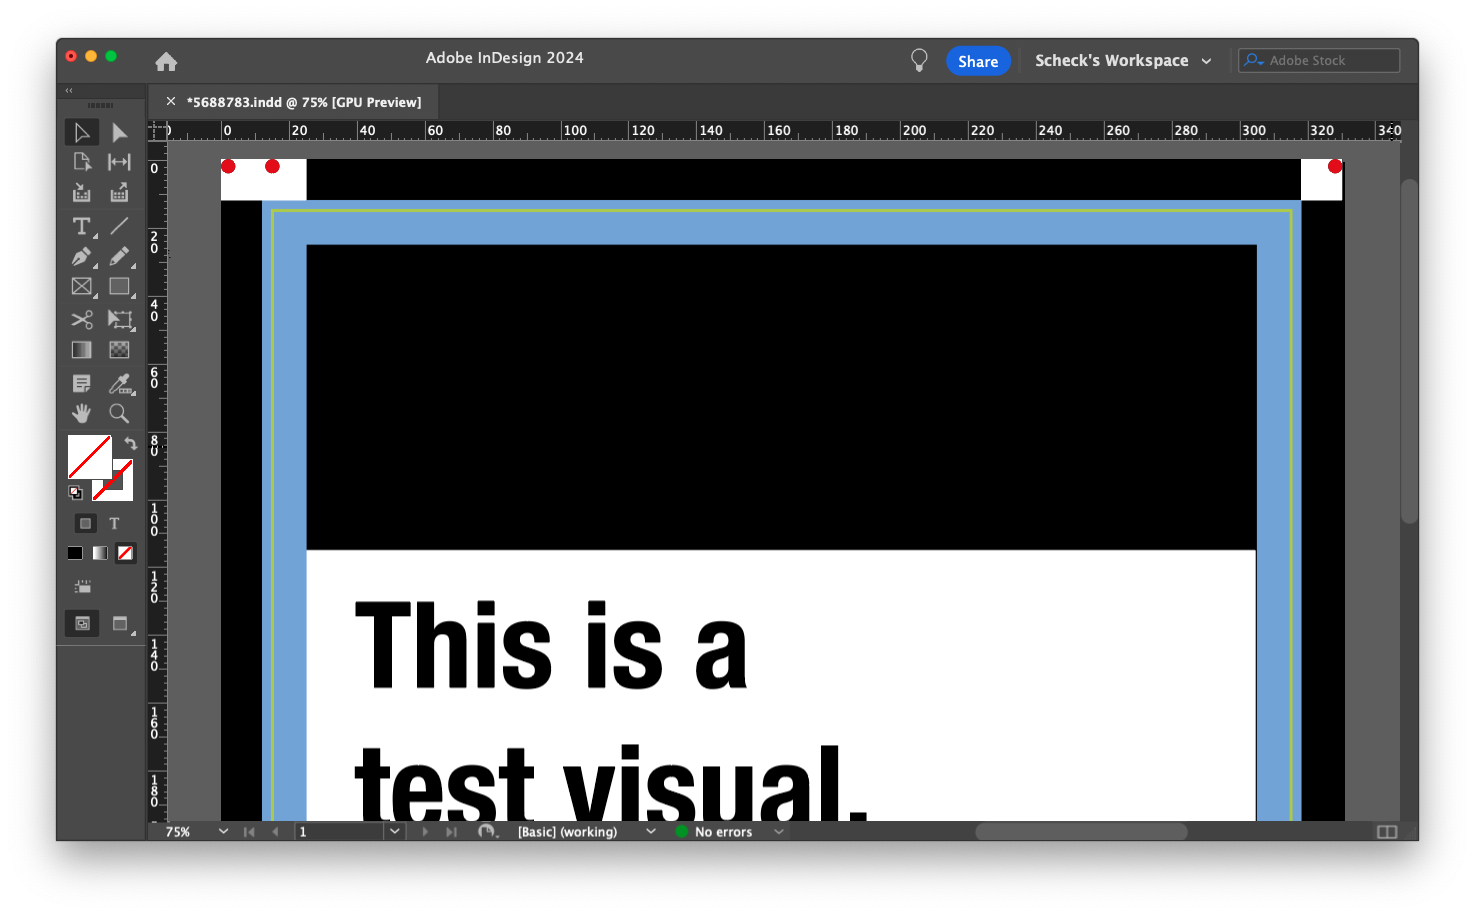
2) Finishing Layer
The finishing layer MUST be present in the print ready PDF.
Specifying Drilled Holes or Fixing Kits
3) Drill holes
If required, drill holes need to be specified with solid DIE-CUT FORME circles with the fill set to Overprint.
A 5mm diameter hole is the minimum and there is no maximum restriction.
However, if you are using standard screws to fit the sign then you probably wouldn't want to go bigger than 5mm anyway (NB You should verify this for yourself BEFORE ordering/fitting).
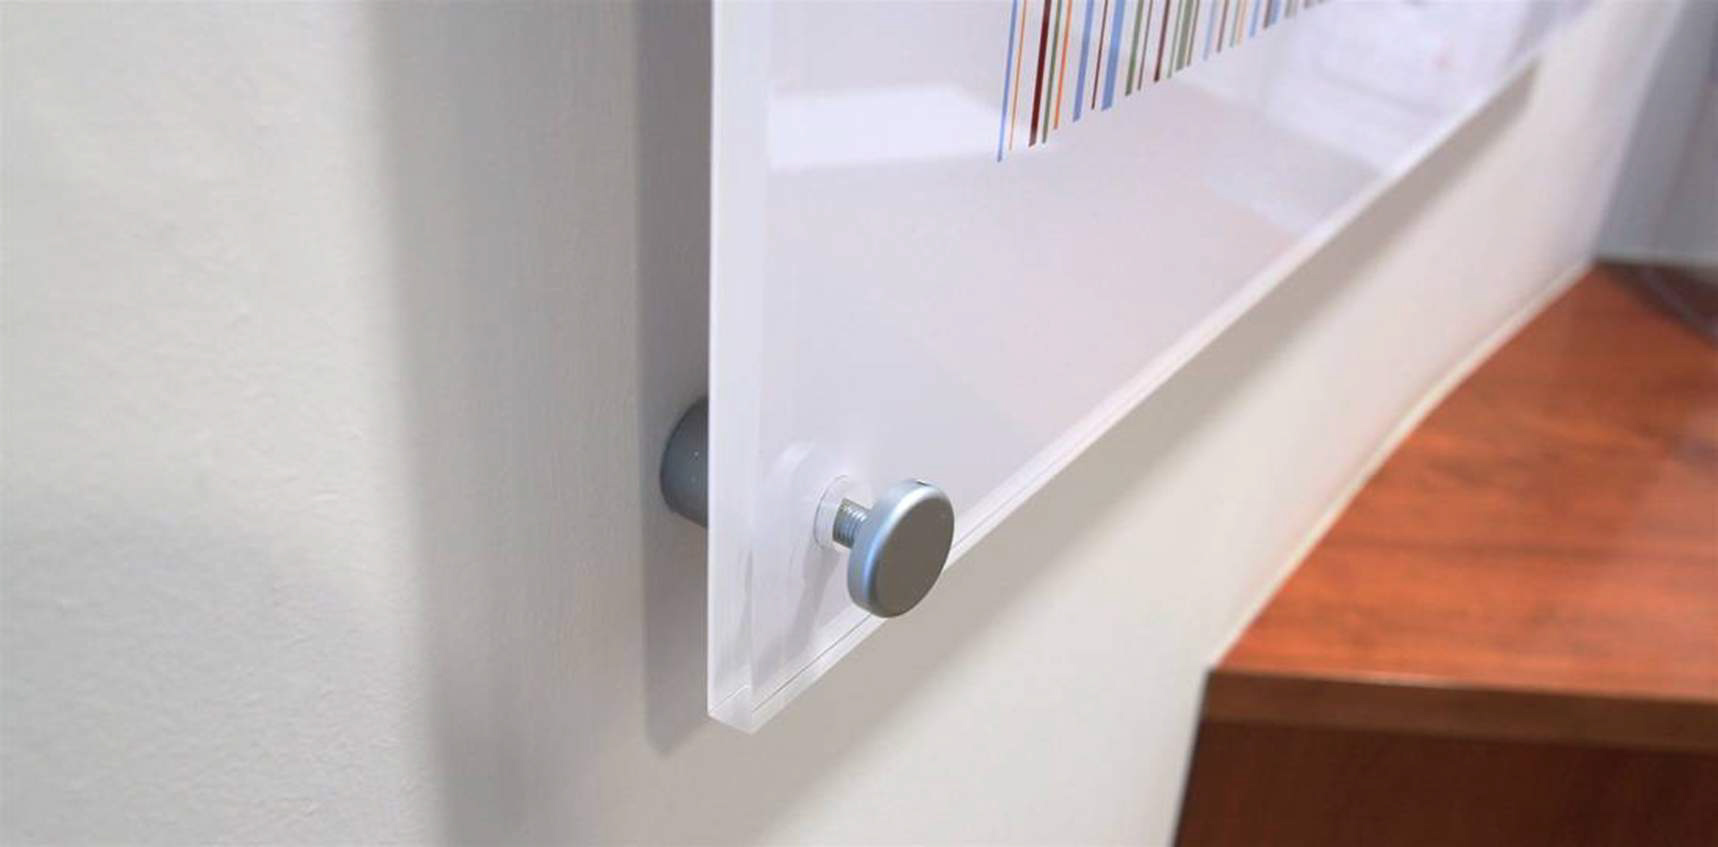
4) (Stand-off) Locator Drill Holes
Locators are the chrome fixings that go through the panels to stand them away from the wall.
We have two types of locator:
- IGLOC16 use a 12mm diameter holes positioned 20mm in from edges,
- IGLOC25 also use 12mm diameter holes positioned 20mm in from edges.
Add one of these Locator finishing options to the job: IGLOC16? or IGLOC25?
These provide the option for the product to be drilled with the locators.
If these finishing options are present, the file must have the following features or the job will be 91'd and face delays.
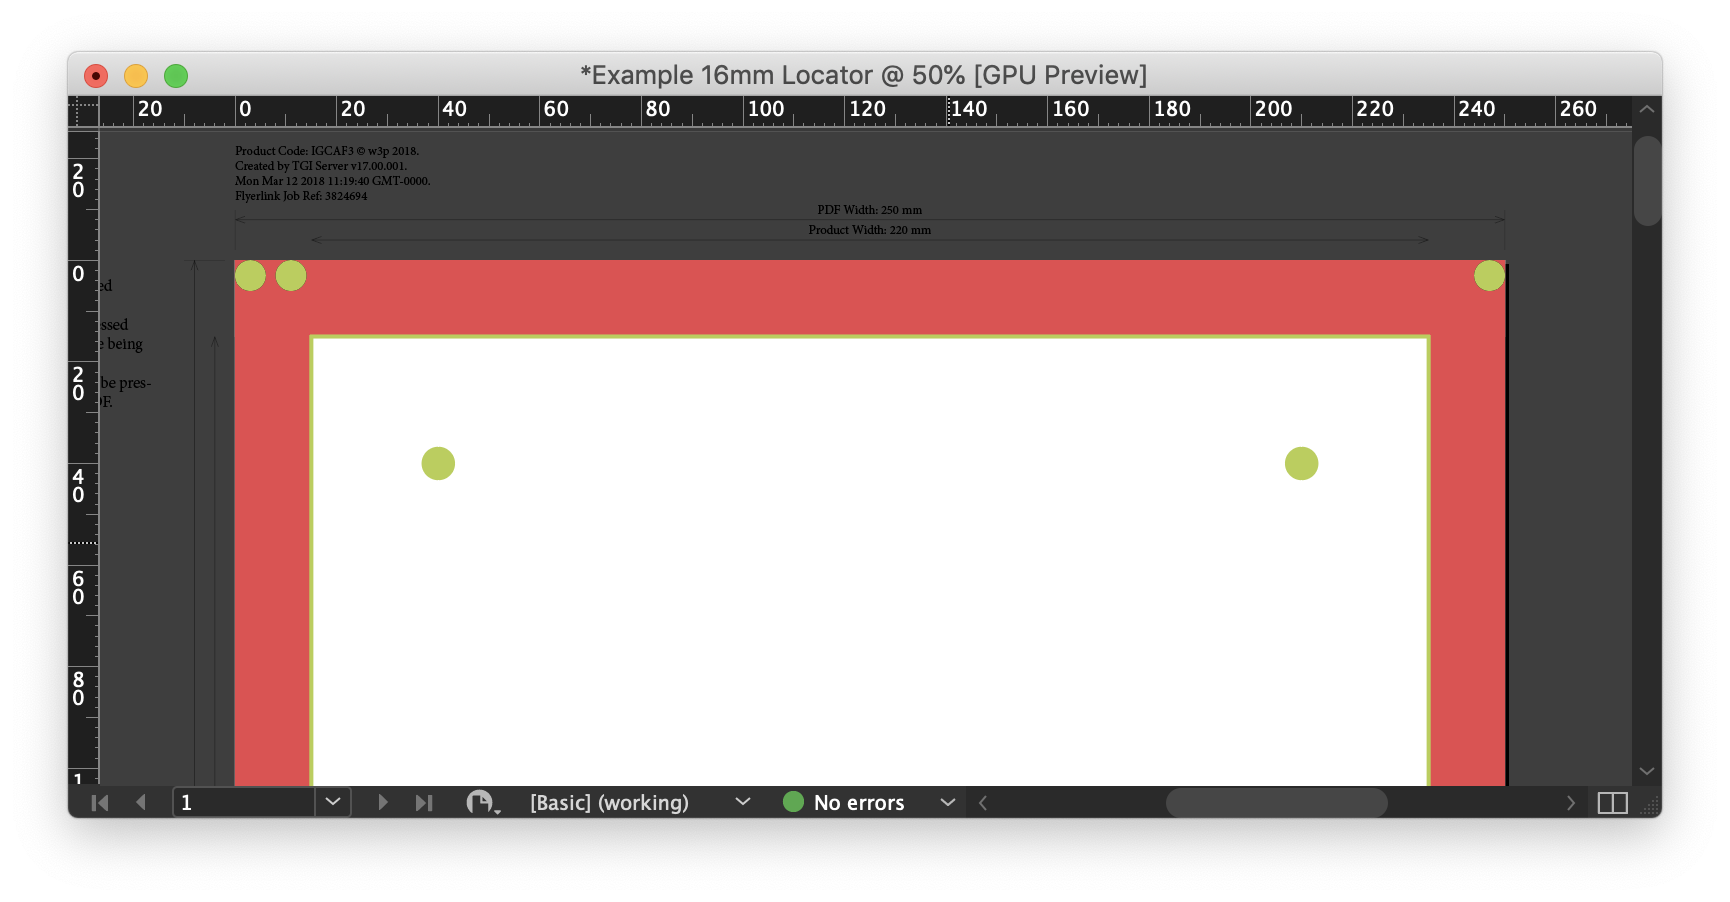
Locator Drill Hole Position
You should have the locator circles positioned 25mm from the trim edge. Which is 40mm from the page edge.
16mm Locators - 12mm diameter DIE-CUT-FORME circles
 25mm Locators – 12mm diameter DIE-CUT-FORME circle
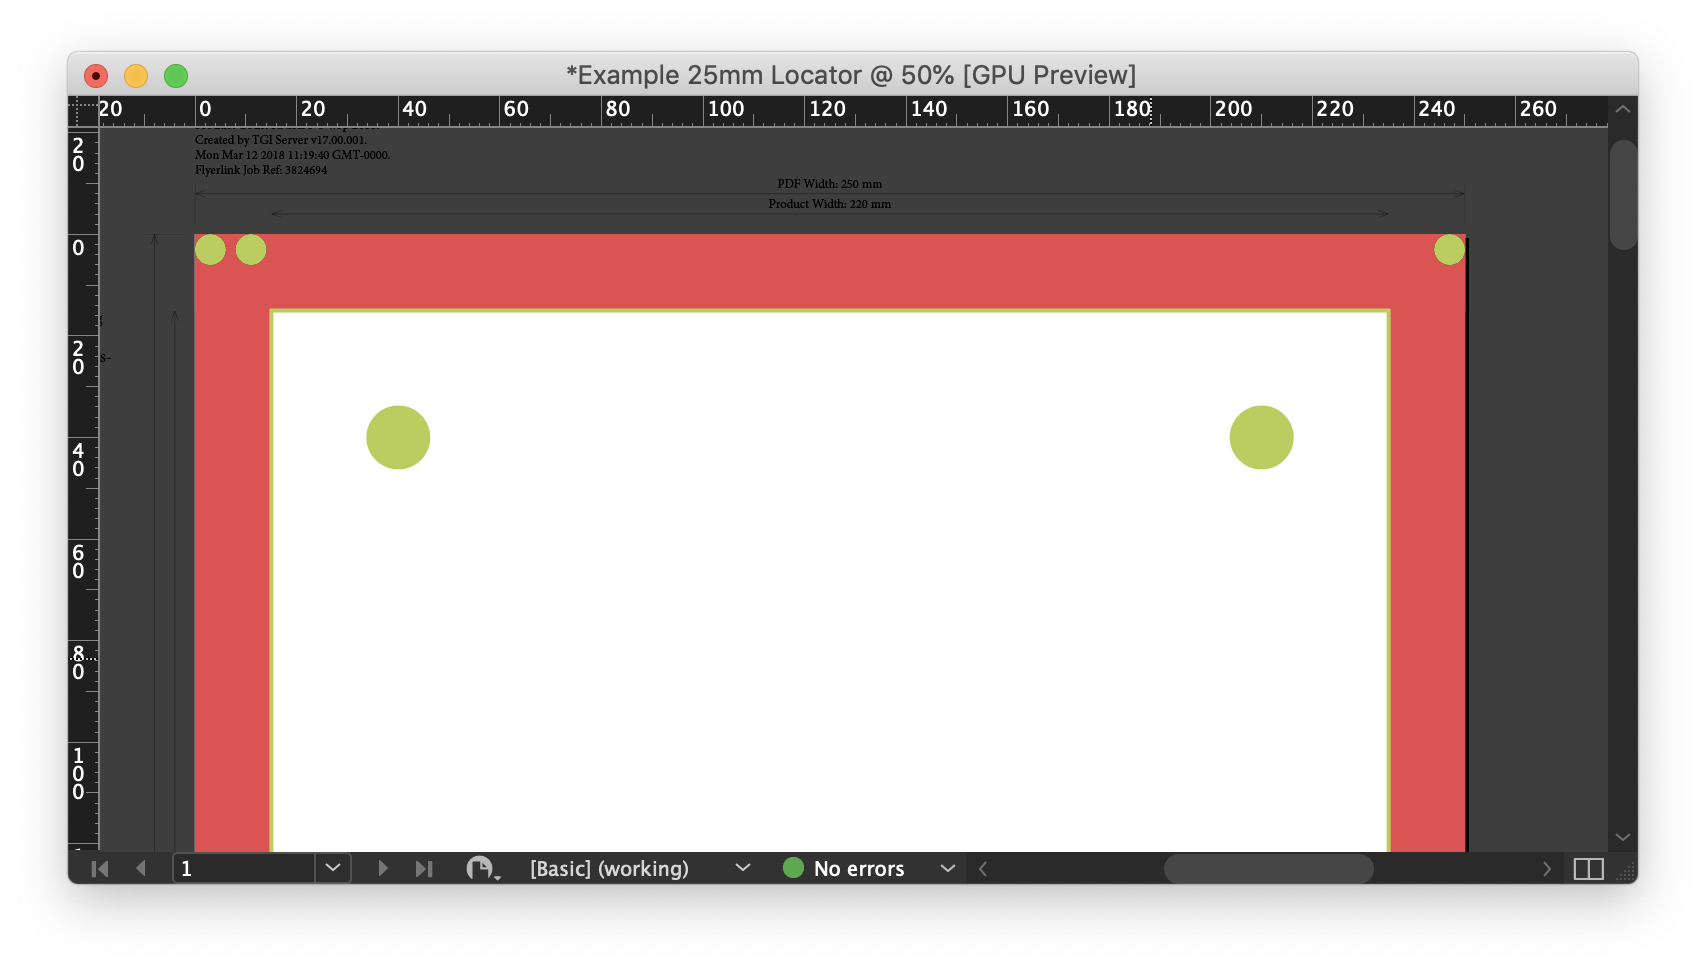
These should be positioned in the 4 corners then at the mid-point's page size (NB Locator quantity dependant).
Example Locator mark files can be downloaded here

 Print this page